Pages

31 July, 2015

More and More Banners

Last week I had the opportunity to help give the school board a tour of my school. They meandered around, making comments and asking questions. A photographer snapped pictures occasionally of the rooms that have slowly become classrooms.

My classroom looks almost ready to go! I have a ceiling, electricity, and running water. All I need is carpet, whiteboards, and bulletin boards.

I am excited to visit again soon. The building inspector's visit is scheduled for a week from today. We are all crossing our fingers that he (or she) will find nothing wrong and will give us the green light to move in a week from Monday.

Even my skylights open and close now. I am a pretty lucky girl.

One thing that I made the last couple of weeks is pizza. Lots and lots of pizza. I have perfected the easy dough recipe I found and have been harvesting our basil like crazy. I could eat this every day. (For a while, I was eating it every day.)

Another creation I made are these awesome gold magnet letters. My only complaint with the generic magnet letters is that they only give you one letter per pack. Why do I need three q's but only have three e's? My awesome landlord's kids enjoyed spelling out their names the last time they visited.

Finally, I have been making more and more banners. I love this one because it is a specific font. I can string my twine through the stars for this easy one.

I ran out of ideas for shapes for my banners. Because I have been creating these banners like crazy, I wanted each one to be a bit different. This one is very different. They look like ghosts to me.

I adore this one. Each letter sits on a tag shape.

My spelling banner consists of scalloped rectangles.

And...guess what this one is supposed to spell? It doesn't help that you can't read the letters very well or that I am missing a letter.

Last, but not least is my outside welcome banner. Gold glitter doilies with two sets of circles (one scalloped, one regular) and green striped letters on top. It's simple and classy.


Linking up

20 July, 2015

Birthday Banner

I think birthdays (or half birthdays) in the classroom are a wonderful thing. I don't go over the top to celebrate or take up more than five minutes for the birthday kid, but I like to do small things to make them feel special. I try to remember a few days in advance how excited they are for their birthday. On the big day, I try to call them "birthday boy/girl" at least a few times. A few months ago, I thought of another thing I could do to make it just a little more special.
Last year, I was cleaning out my drawer that holds all my (dozens of) banners during recess. Some of my adorable girls were helping out and they saw a store bought birthday banner that some of my students bought me my first year of teaching. They got really excited because it just so happened to be someone's birthday on that very day! The girls grabbed it and hung it up on the back whiteboard. That got me thinking...
What if I made a cuter banner to hang up on a kid's birthday (or the school day in which the child was being celebrated)? Any teacher could do that and hang it up in the classroom, but what if I hung it up outside of the classroom so that any passer by would see that someone was having a birthday in my classroom, just to casually announce it to the world? And so my birthday banner was born. It took a while to make the gold dangly pieces because I didn't have the exact type of material that I would have liked, but in the end, it may just be my favorite banner I have ever made. (And that's saying something.)
I love the glitter lettering. I love the shape of the letters. I love the gold tassels. I love the paper that looks just a bit like it has birthday confetti on it. (I was even going to add pompoms to the point of each banner piece, but I thought that might be going a bit overboard...)
I love it.
On either side of my doorway at school, I will permanently put up a couple of clothespins (with gold stars on them) so that assembly and removal of the banner will be a piece of cake. In fact, I'll probably give the job of hanging the banner to my students. Because students like to be helpful and stand on chairs and hang things up. (Also, if I forget...someone else can take the blame.)


p.s. Do you love the wall? That has been the great project this summer for my husband and me. We have painted everything except for the tall wall towering over the stairs.
Also, yesterday I talked about what I do with all of those paper scraps I get while making these projects.

Linking up

19 July, 2015

Stress Reliever

My husband commented to me the other day that I need to make things. I get too bored if I have nothing to do for too long. Crafting is my stress reliever. I am running out of things to make for the upcoming school year and I don't know what to do next...

The first thing I am making is ruffles. Lots and lots of ruffles on my vintage Bernina. The stitch length is as wide as it will go and as I sew, I barely hold onto the thread. It ruffles perfectly! It is also pretty to look at. I have made a ruffle roll out of what I have made so far. It's so pretty! You'll have to come back in a couple weeks to see how I use this in my classroom. This one is simply decor. (They do make great chic streamers also.)


I also made vocabulary cards for both my science units this year. I will laminate them, put a magnet on the back, and have them up on the whiteboard whenever I am teaching about that concept.

More science supplies. One of my units is inherited traits.

Because I have been using a lot of paper lately, I have a lot of larger paper scraps. When the scraps are large, I cut them into rectangles and bring them into my classroom for my students to use for their creations. If I have smaller scraps, I make these awesome bookmarks for my students.


If I just have a bit of paper, I cut it into long strips for regular bookmarks. I want to have a bookmark bin for students this year.

I also redid my calendar. I still love my old calendar, but this one is more visible. The numbers on my last calendar were tricky to see from the back of the classroom.

12 July, 2015

Bad Pictures of Cute Banners

In the past, I have labeled my bulletin boards, but only with flimsy paper letters that I threw away when I changed up the boards and the later regretted throwing away the letters because I needed to cut out a new label.
Earlier this week, I cut out lots of banner shapes out of double-sided cardstock and then cut out letters for my bulletin boards. I laminated them separately so that if I want to change what one says, I can easily take off the laminated letters and file them away.
Taking pictures of lamination is tricky. I'll get better images once they are hung up in my classroom.

One for Class Dojo. I switched my rewards system last year from punch cards to Class Dojo. It is much simpler and super easy to pull out my phone to give points. There are magnet boards that the kids move up every day.
The front side has green dots on it and the back is covered with blue and green leaves.

I want my math groups to be better organized this year. There will be a spot in the classroom that holds all the materials. The front side is green dots on white and the back has straight green vines over green.

I have social studies on bulletin boards a few times each year. I did the letters over a map of the world paper and the back is a pink lattice paper.


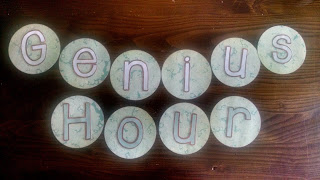
My school is piloting genius hour in my district. We won't even have the technology for a month or two to fully implement it, but I already have an awesome bulletin board designed in my mind. This paper was single sided.

This one is probably my favorite. I might have to make two smaller banners to outline matter and heredity. The frond is black arrows and the back is gray triangles.

I also spray painted some of my own school supplies gold. My students last year were really into making things and I often found them leaning over my stuff to grab my stapler (even though there was one for them to use with much easier access.) My rule this year? If it's gold, it's mine. Don't touch.
(Side note: You can see my name smudging off the stapler. The only reason I put my name on it is because my student stapler disappeared last year. I still don't know what happened to it, but in all innocence, I imagine someone accidentally took it and because there was no name, they did not know who to give it to.)


Linking up:


09 July, 2015

New Toy!

I love walking around craft stores. I could spend hours in Michael's or Hobby Lobby, meandering across the inspirational aisles. If I ever go into a craft store, my one rule is that I cannot take a basket or shopping cart with me. Everything I want to purchase has to fit in my arms. Sometimes I look a little ridiculous as I approach the register, my arms overflowing.
Yesterday I stopped by Michael's. I needed white cardstock and doilies. The only problem? They had a terrible selection of doilies. Yes, they were cute, but there were limited sizes and colors. I had my heart set on gold doilies, but after walking by all the shelves that contained doilies, I about gave up. Just for fun, I located the Martha Stewart section. I like to drool over her supplies. Sitting there, all innocently was a tool I knew I needed.

It's a Martha Stewart circle punch and it makes doilies guys! In the back of my mind for the duration of the shopping trip, I was chastising myself for not just using my Silhouette to cut out the doilies. It was more than capable, I could use whatever paper I wanted, and the designs were almost limitless. The other part of me knew I probably would never use my Silhouette to do this because I do not want to spend hours peeling tiny bits of paper off of the cutting mat.

I coveted that little instrument for a minute, knowing that I would never spend $28 on a little tool if I already had a machine that could do the job just as well. Inspiration struck. I checked out the Michael's coupon on my phone. Sometimes they do not allow their coupons to be used on Martha's supplies. Yesterday was an exception.

I bought it and hurried home to try out my new toy. The tool comes with one cartridge and thankfully it was one I liked. Whenever I buy new toys, I like to see if I can figure it out without instructions. Sometimes this goes disastrously. The instructions are simple for this little guy.


Take the extra metal piece that is in the same case as the cartridge and put it on the tool. Then decide what you would like the circle's diameter to be. Move the two pieces so they are both pointing to that number.


Find the center of your piece of paper and attach it to the tool with the round knob (held on by magnets).


Then put the cartridge above the knob, also held on by magnets. (Why do I think things with magnets are so cool? Probably because I taught magnetism for a year and I now have a bunch of cool magnet toys.) Punch down the cartridge and remove it.


You have the start of your doily!


Rotate the knob once. I rotated it counterclockwise to be a rebel.


Keep rotating it and punching.


After you do your last punch, you have a doily! (I hate taking pictures of glitter paper.)


I did 24 in less than half an hour. If I would have used my Silhouette for the same job, I imagine it taking at least three times longer with a lot more work involved.


I now have adorable gold glittered doilies to use!

BONUS: After showing my husband my cool new toy, he got really excited. "We can put a cake on one." I love it when he is happy for me and my toys.

I might have to head over to my favorite craft stores to see if they have sales on their cartridges. Here is another one that I think is adorable! (Source)


06 July, 2015

Library Organization

I have school library jealousy. If I could have my dream library organization, I would go with this scanner on Amazon:

But, who am I kidding? I am not a librarian.
I have also looked into book scanning apps, but I do not want my students touching my phone and up until this year, I have had no other form of scanning.
Last year I had a binder with a checkout page for each student in it. What was wrong with that system? I got bored with it and I was sick of the binder being out on my counter every day.


I cut out a bunch of library pockets and student numbers and promptly laminated them. (If you do not have your own laminator, I would highly recommend purchasing one. They are not expensive at all, I buy laminating sheets with school money to use for these projects, and it's nice having a harder lamination on all my creations. I purchased mine at Target for $20.00 and I used a gift card from one of my students so it really didn't cost me anything.)


My least favorite part about laminating is cutting it all out again at the end. I figure that the extra time I spend now will make it so I don't have to remake my school supplies every year. These pockets will be by my library so that students can easy access them, but they will be on the sides of my bookcases so they are out of the way.


In the pockets, I will have a checkout slip (similar to the ones found on I Love Labels) and two large popsicle sticks with the student number on them. When students check out a book, they simply place their popsicle stick as a placeholder so that my library stays as beautiful as possible. I made the sticks with a clear label containing their student number over a one inch strip of blue or green washi tape.


I also have been painting things with gold paint. I covered magnetic letters with gold spray paint and used regular gold paint to paint an Ikea planter and the top of this paperclip holder.


Linking up: